Little Shop of Horrors
For the 10th year in a row, we made the programs for the spring musical at our local high school. As always, it took tens of hours to design, print, collate, staple, and fold the 1500+ booklets. And like normal, we made some special editions that were hidden among the rest.
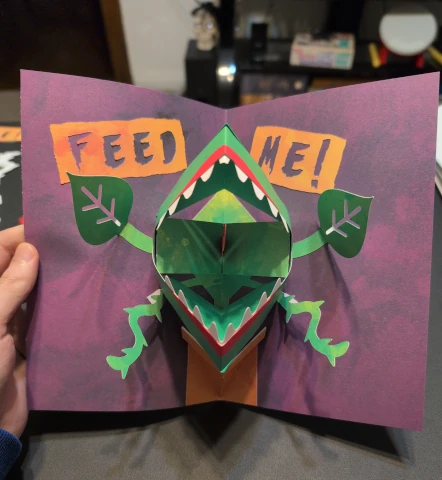
Usually those special editions are something simple, like having a foil cover or fuzzy stickers inside. This year was more ambitious – pop-up books!
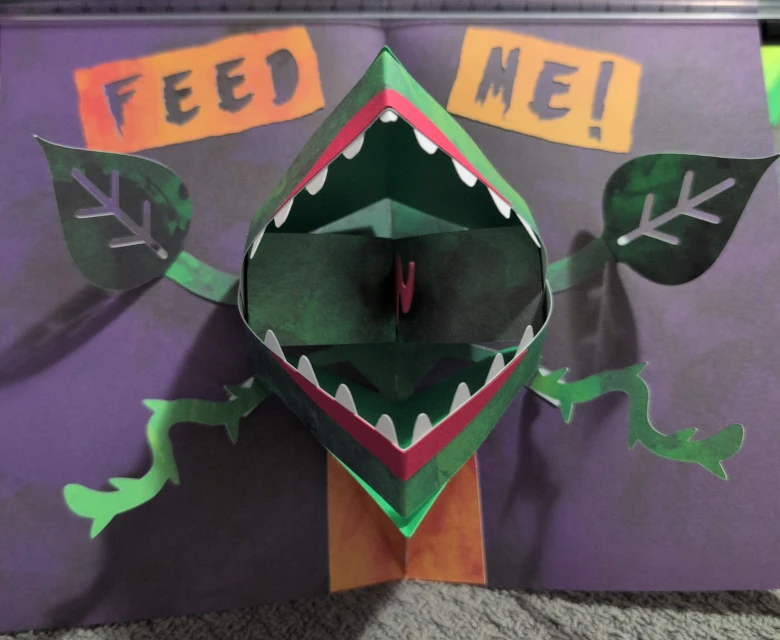
I haven't made one of these in decades, so it took a few (or more) tries, cutting things out by hand and gluing them together.
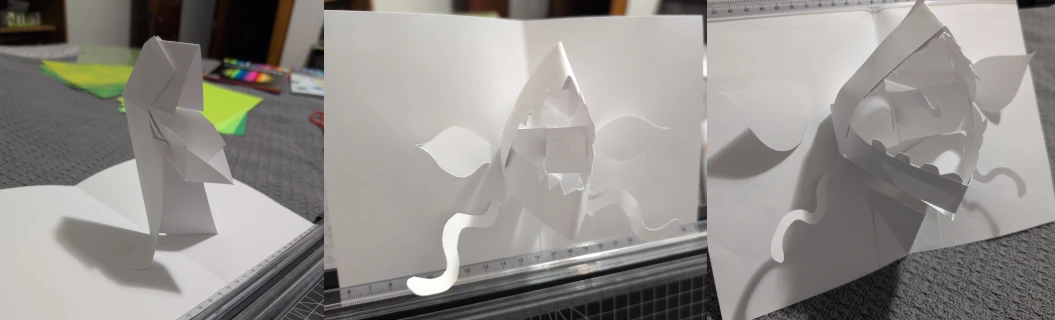
Once I came up with a design that I liked, I drew something similar in Inkscape, along with some extra pieces to help easily replicate the layout. I didn't trust myself to cut everything out by hand, so I went to the store and got a Cricut Maker 3, then quickly learned to use its frustrating software. I switched from a glue stick to double-sided tape for the final assembly, because it held better.
Make Your Own!
Feel free to modify this any step of the way. Don't feel like you have to match colors.
1. Download the SVG files. Extract that ZIP file, then check out the readme to see how many books each one makes.
2. Cut them out. I used a Cricut, but you can use a different machine, or print and cut them out by hand.
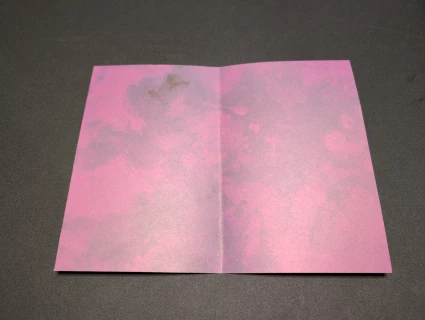
3. Get a purple piece of paper to use as the background. Fold it in half, then unfold it to see the center line.
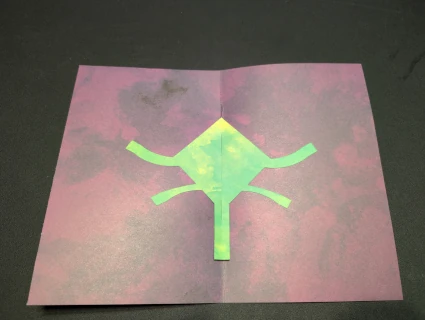
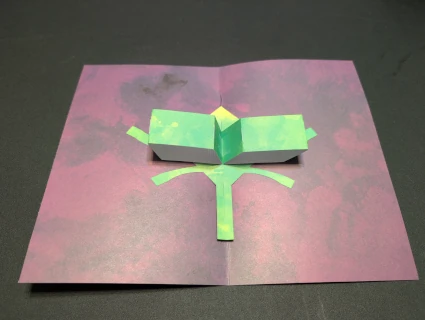
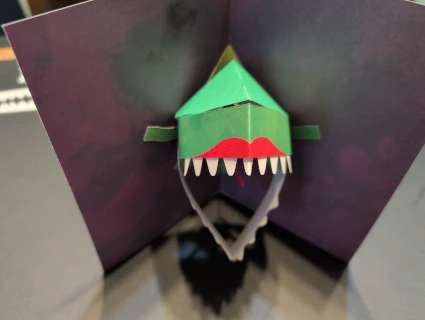
4. Attach the green background piece that looks kind of like a face-hugger from Alien. This piece makes the base of the tentacles, and helps you see where to attach everything else.
5. Make two boxes, and attach them to the page.
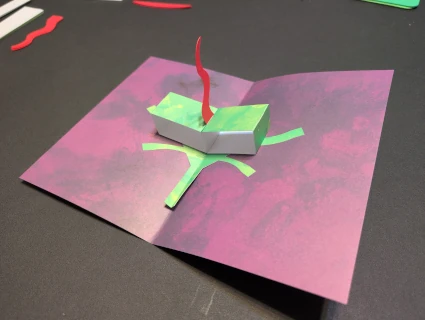
6. Attach the tongue to one of the boxes, then attach the boxes together.
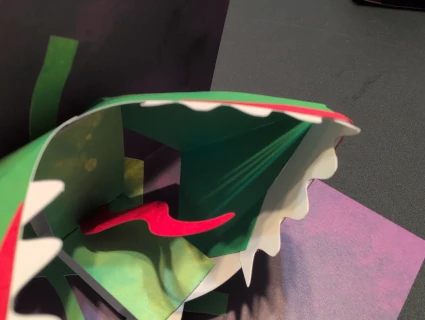
7. Fold the top of the mouth in half. I didn't figure this out until later, so the picture is wrong, but you should also attach the teeth at this point! You'll attach it to both sides of the boxes, but make sure you position it in a way that doesn't stick out the side when the book is closed.
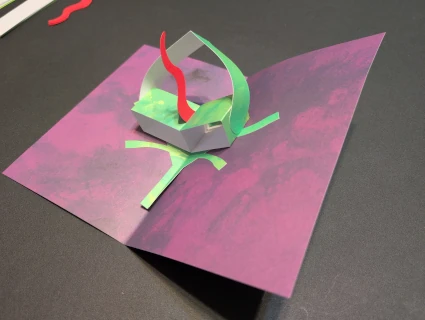
8. Attach the bottom of the mouth (including the teeth) in the same way as the top.
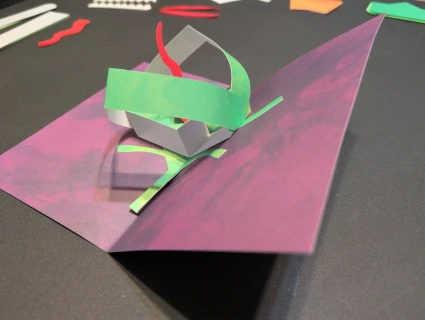
9. Attach the lips.
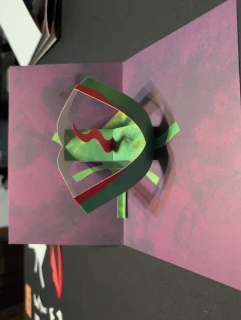
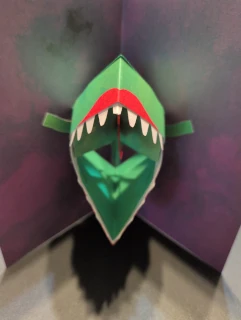
10. This is how it should look at this point.
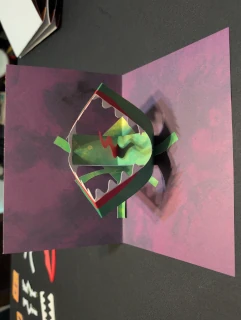
11. Fold the top and bottom pieces in half, and fold down the side wings.
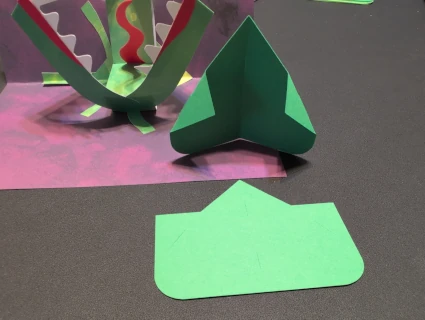
12. Attach the top by putting the wings inside the part with the lips and teeth, and trying to align the front ends to minimize gaps. You might have to trim the back (rounded) part to get it to fit properly.
13. Attach the bottom in the same way.
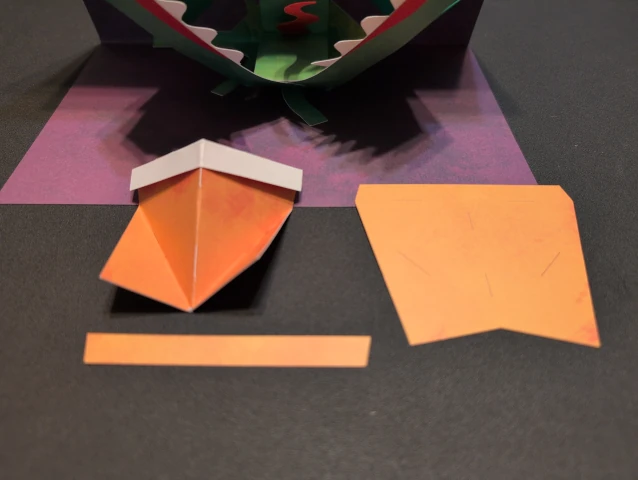
14. Fold the orange flower pot. Attach the orange strip to make the top lip of the pot. Then attach it along the bottom edge of the page.
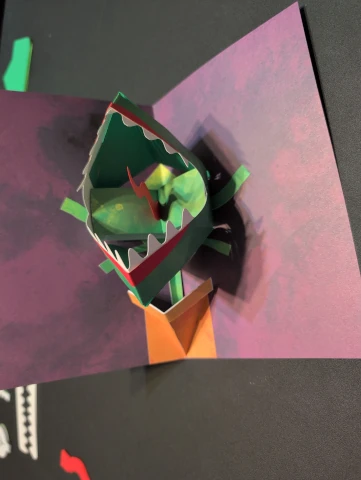
15. Fold the ends of the leaves and vines, and attach them to the page. Add the "FEED ME" signs wherever you like.
16. Open and close the book over and over again while you appreciate your hard work.